Grilled Corn On The Cob
Grilled corn on the cob is incredibly easy to make and full of flavor. It’s the must-have side dish for summer barbecues, picnics, Memorial Day gatherings, and Fourth of July celebrations.
Suitable for gluten free and vegetarian diets. Post includes Weight Watchers points.


My family loves grilled corn on the cob. And no backyard BBQ, Memorial Day, 4th of July party, or summer grilling is complete without someone grilling corn on the cob all the ways. I am talking a handful of ingredients I already own, simple flavors, and 5 minutes of prep to this essential BBQ side dish.
Honestly, if you’re new to grilling, or you’re like me and want something that doesn’t involve a pile of dishes, this incredibly easy grilled corn is about to be your new go-to. I just toss the ears on the grill, brush on some butter, and that’s literally it. Simple, like my grilled broccoli, this baked potato on the grill, and my best summer grilling recipes.
Want to save this Recipe?
Enter your email below and get it sent straight to your inbox. Along with recipes & tips every week!
Love side dishes as much as I do? Then please do check out this selection of the best bbq side dishes along with these 4th of July recipes. #givemeallthesides
Table of Contents
Recipe Highlights
- So easy: Grilling fresh corn on the cob is an easy side dish that lets you truly enjoy summer’s bounty.
- Super Versatile: Serve grilled corn with all your summer favorites, like steak, chicken, seafood, and of course, the classics like burgers and hot dogs.
- Great for Entertaining: Fresh corn, especially in the summer, is affordable and great for cooking in batches when you need to feed a crowd.
Methods for Grilling Corn
- Keep the husk on – I end up with juicy corn kernel, but it’s a bit of a guessing game as I have to peel it back the husk to see if it’s done. It ends up cooked in steam, so no char.
- Husk removed and wrapped in foil – in which case it still comes out juicy, but it will take longer to cook
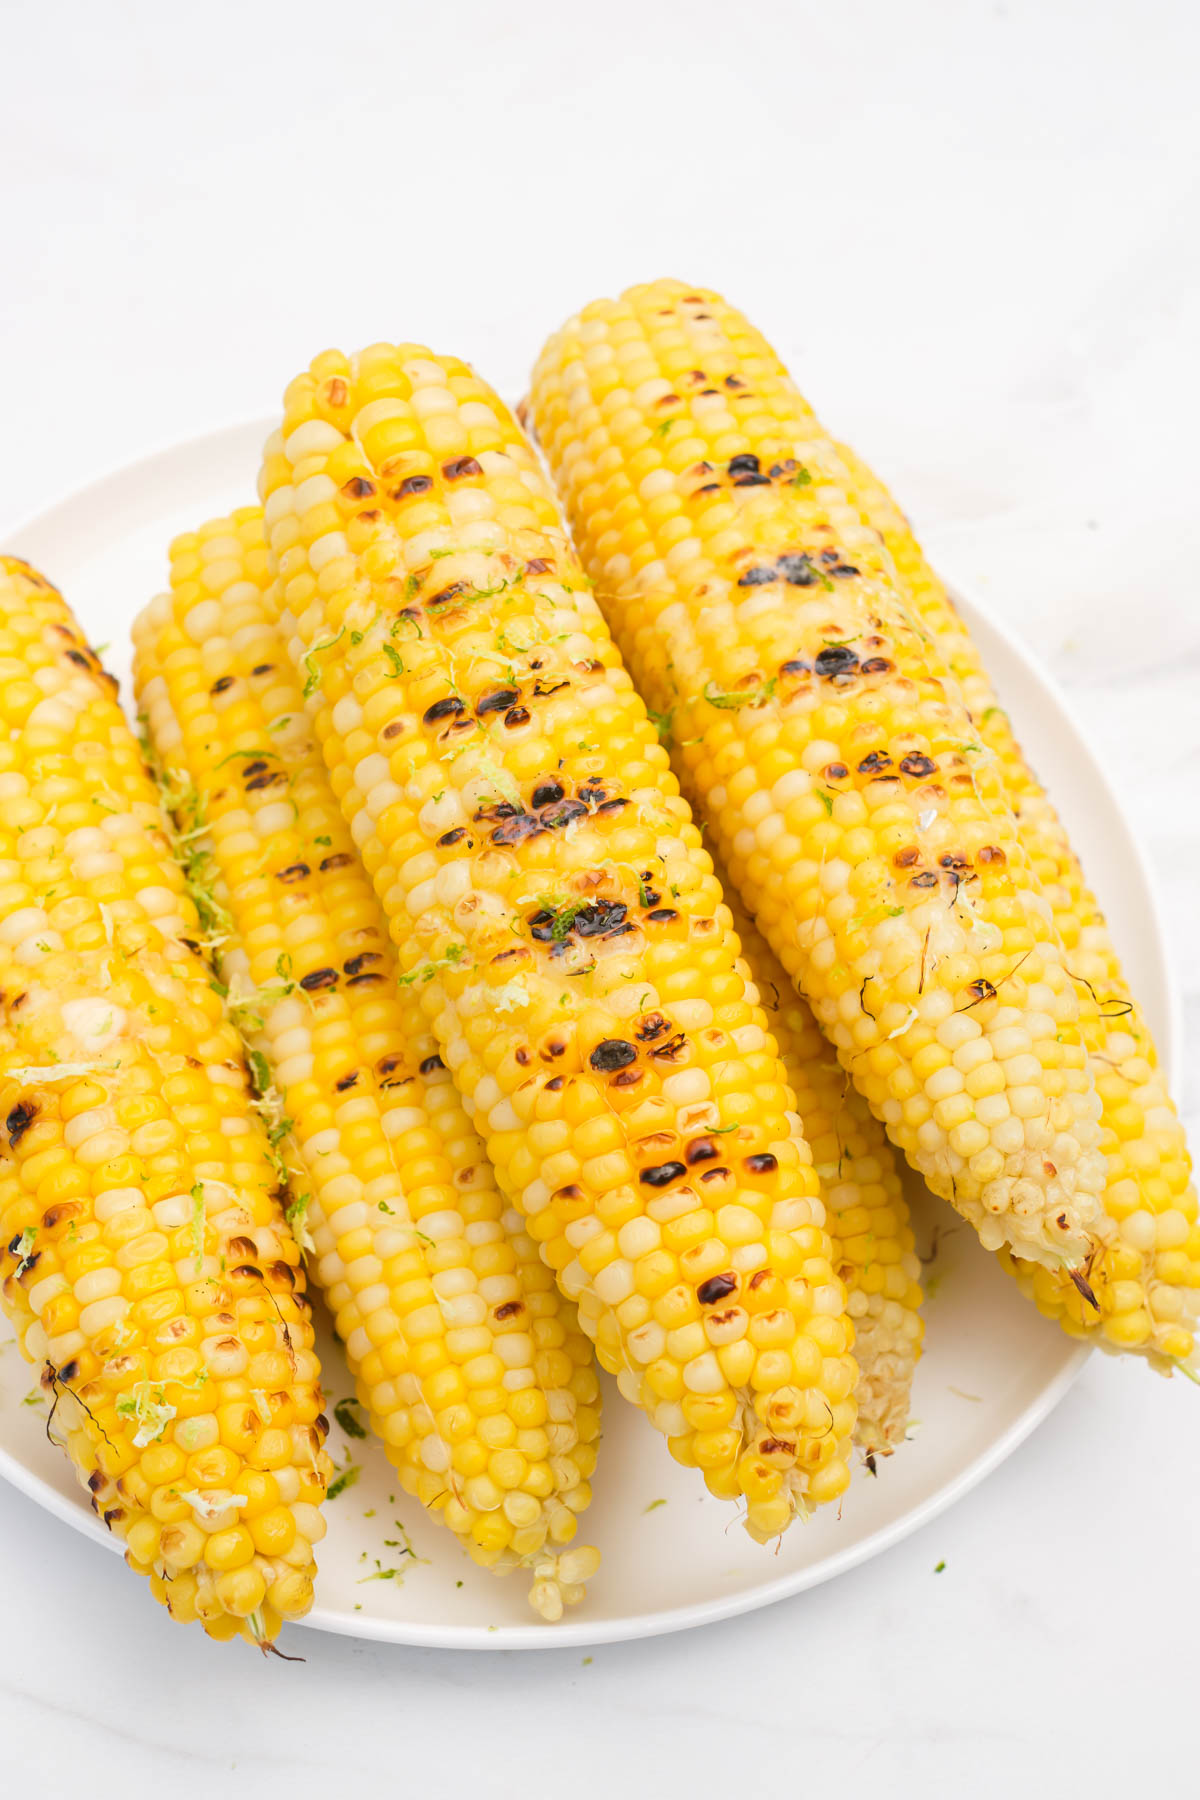
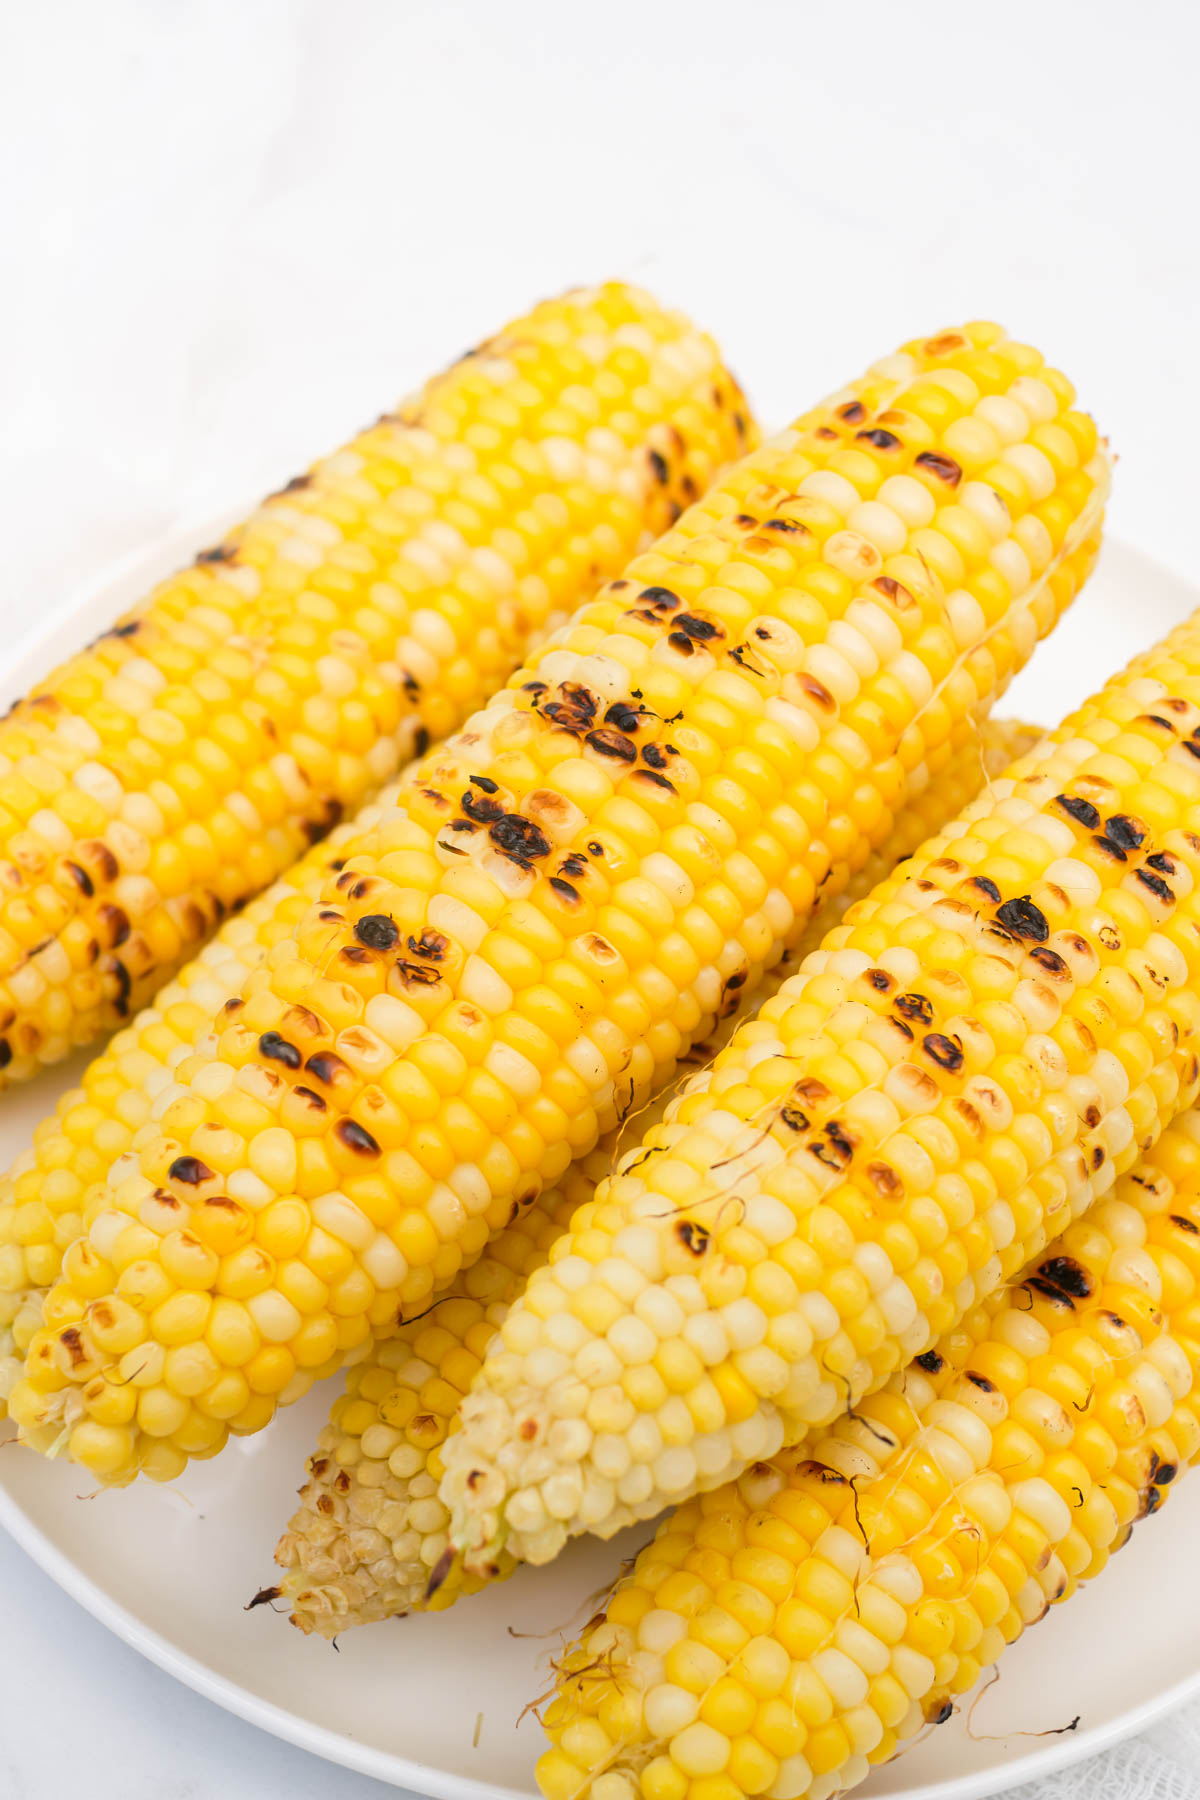
- Husk removed and direct on the grill – The quickest way I grill corn, is by placing the shucked cobs directly on the grill for those smoky char marks. I just have to be sure sure to watch them carefully and turn frequently to avoid burning.
Ingredient Notes
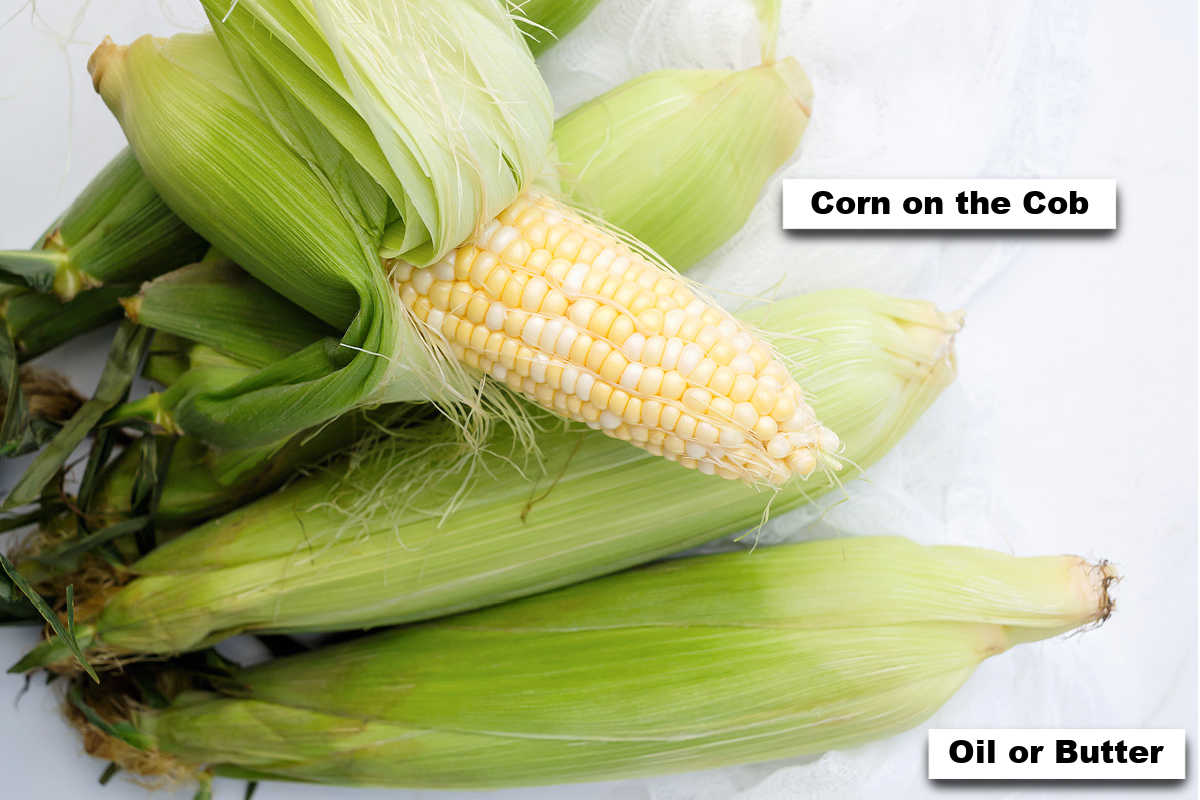
I suggest getting the freshest ears of corn you can find.You want bright green husks and plump kernels, but do feel free to get pre-shucked corn and pre cut ears of corn if easier.
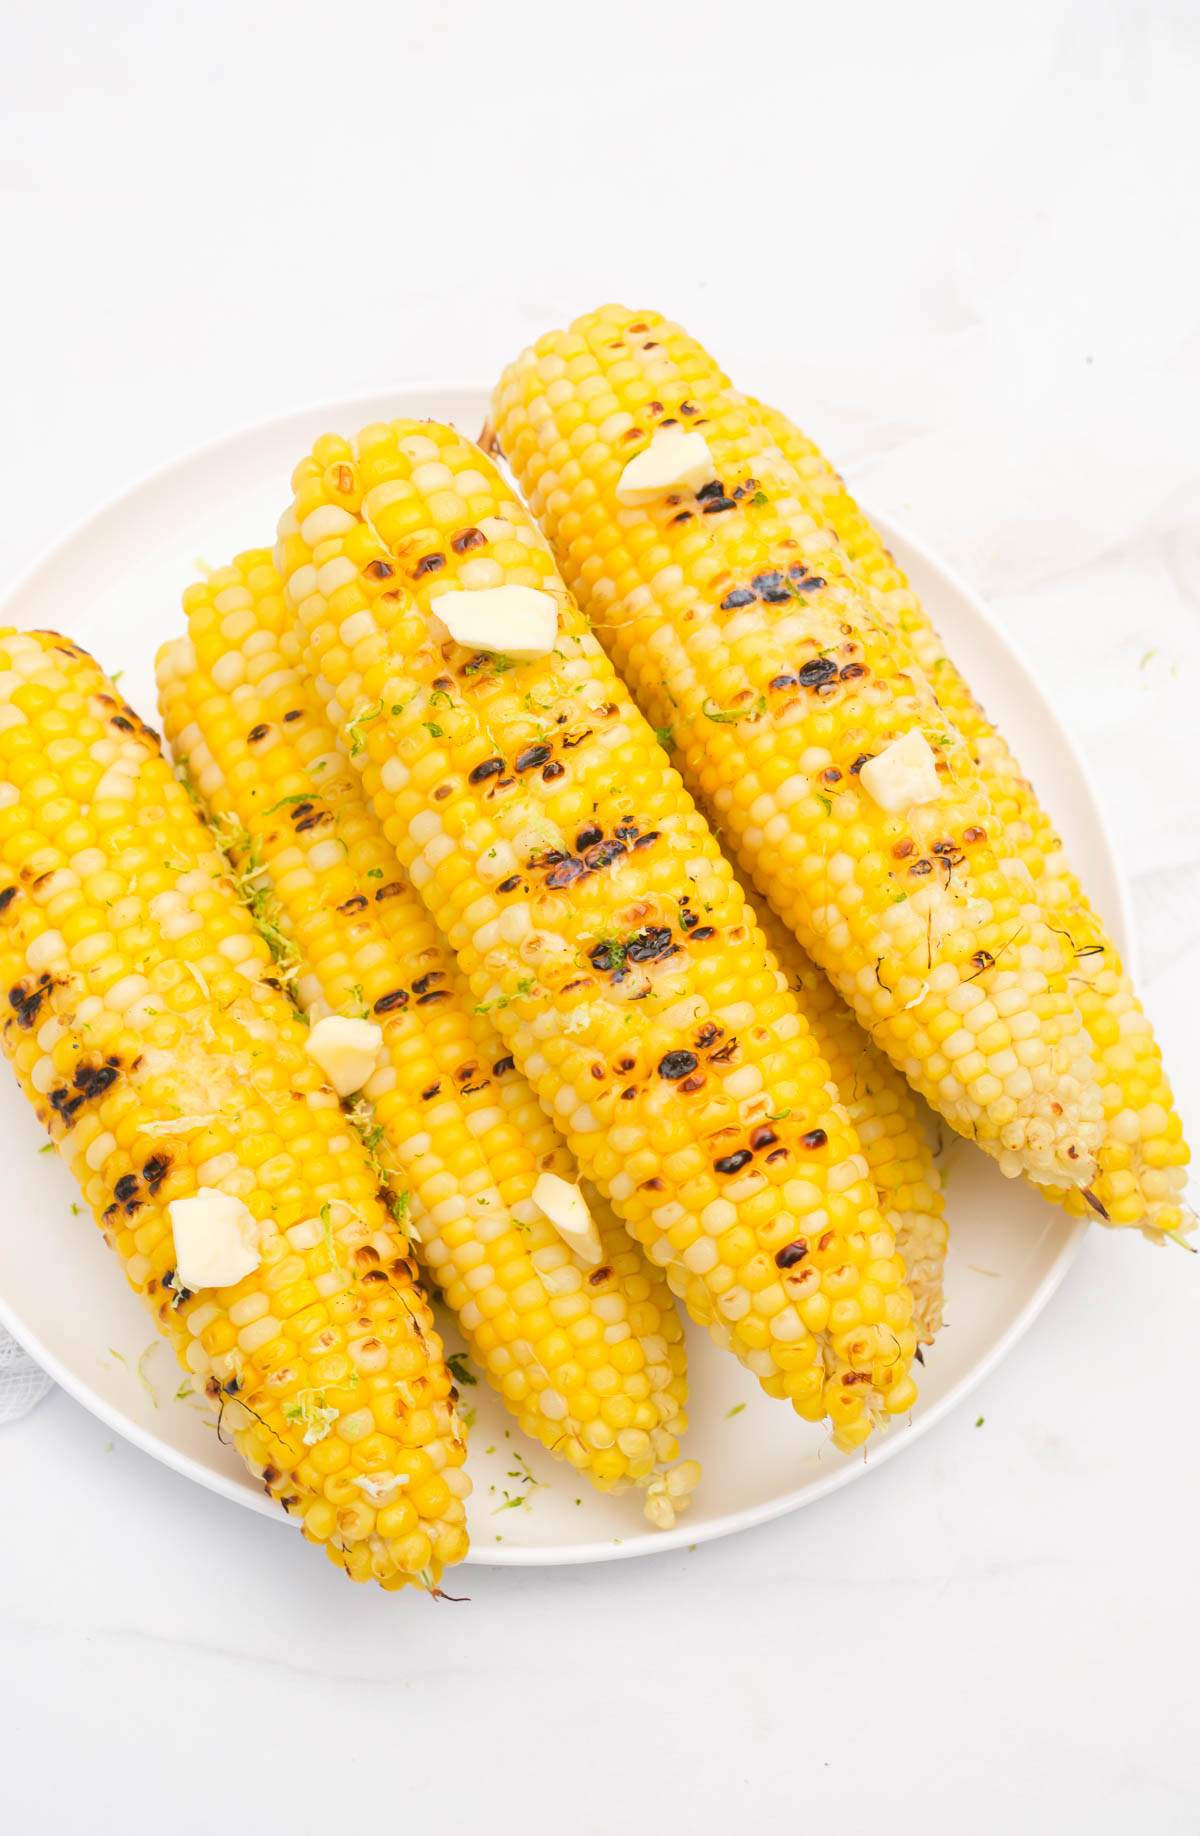
I usually use good-quality extra virgin olive when grilling corn directly on the grates without the husk, for that lovely char without drying out. I also brush on some rich melted butter at the end of grilling, it is soooo worth it.
I love taking my grilled corn to the next level with some of my favorite, alway optional but totally fun topping ideas, Scroll down for my favorite topping ideas, from classic salt and pepper to treats like chili-lime or cotija. There’s something for everyone.
Handy Tip: Use Good Kitchen Tools!
For the best tools to help make your recipe even easier and more successful, check out my collection of the Best Kitchen Tools on Amazon.
How To Grill Corn on the Cob Recipe
Don’t forget to tag #recipesfromapantry on Instagram or Twitter if you try Grilled Corn on the Cob! It is really, really awesome for me when you make one of my recipes and I’d love to see it. You can also share it on my Facebook page. Please pin this recipe to Pinterest too! Thank you for reading Recipes from a Pantry.
Grilled Corn on the Cob
Ingredients
- 4 ears corn on the cob
- 2 tablespoons olive oil or butter for grilling
Instructions
Grill
- Preheat the grill to medium-high heat, and feel free to use a grill pan if you prefer. This can take up to 15 minutes.
- Remove both the husks and silk from the corn and rinse to remove any debris. Pat corn dry with a paper towel or kitchen cloth.

- Brush kernels with olive oil or butter and place corn on the grill or grill pan. Close the grill and cook corn for 8-12 minutes, rotating the cobs occasionally. You will see char/grill marks. If the corn is not cooked enough to your liking, cook for a further couple of minutes. Husk-on or foil-wrapped versions will need another 5 minutes or so.
- Check if they are done by inserting a skewer or fork into the thickest part of the cob. If the kernels are easily pierced, you’re good to go. Otherwise, cook for another couple of minutes and test again.
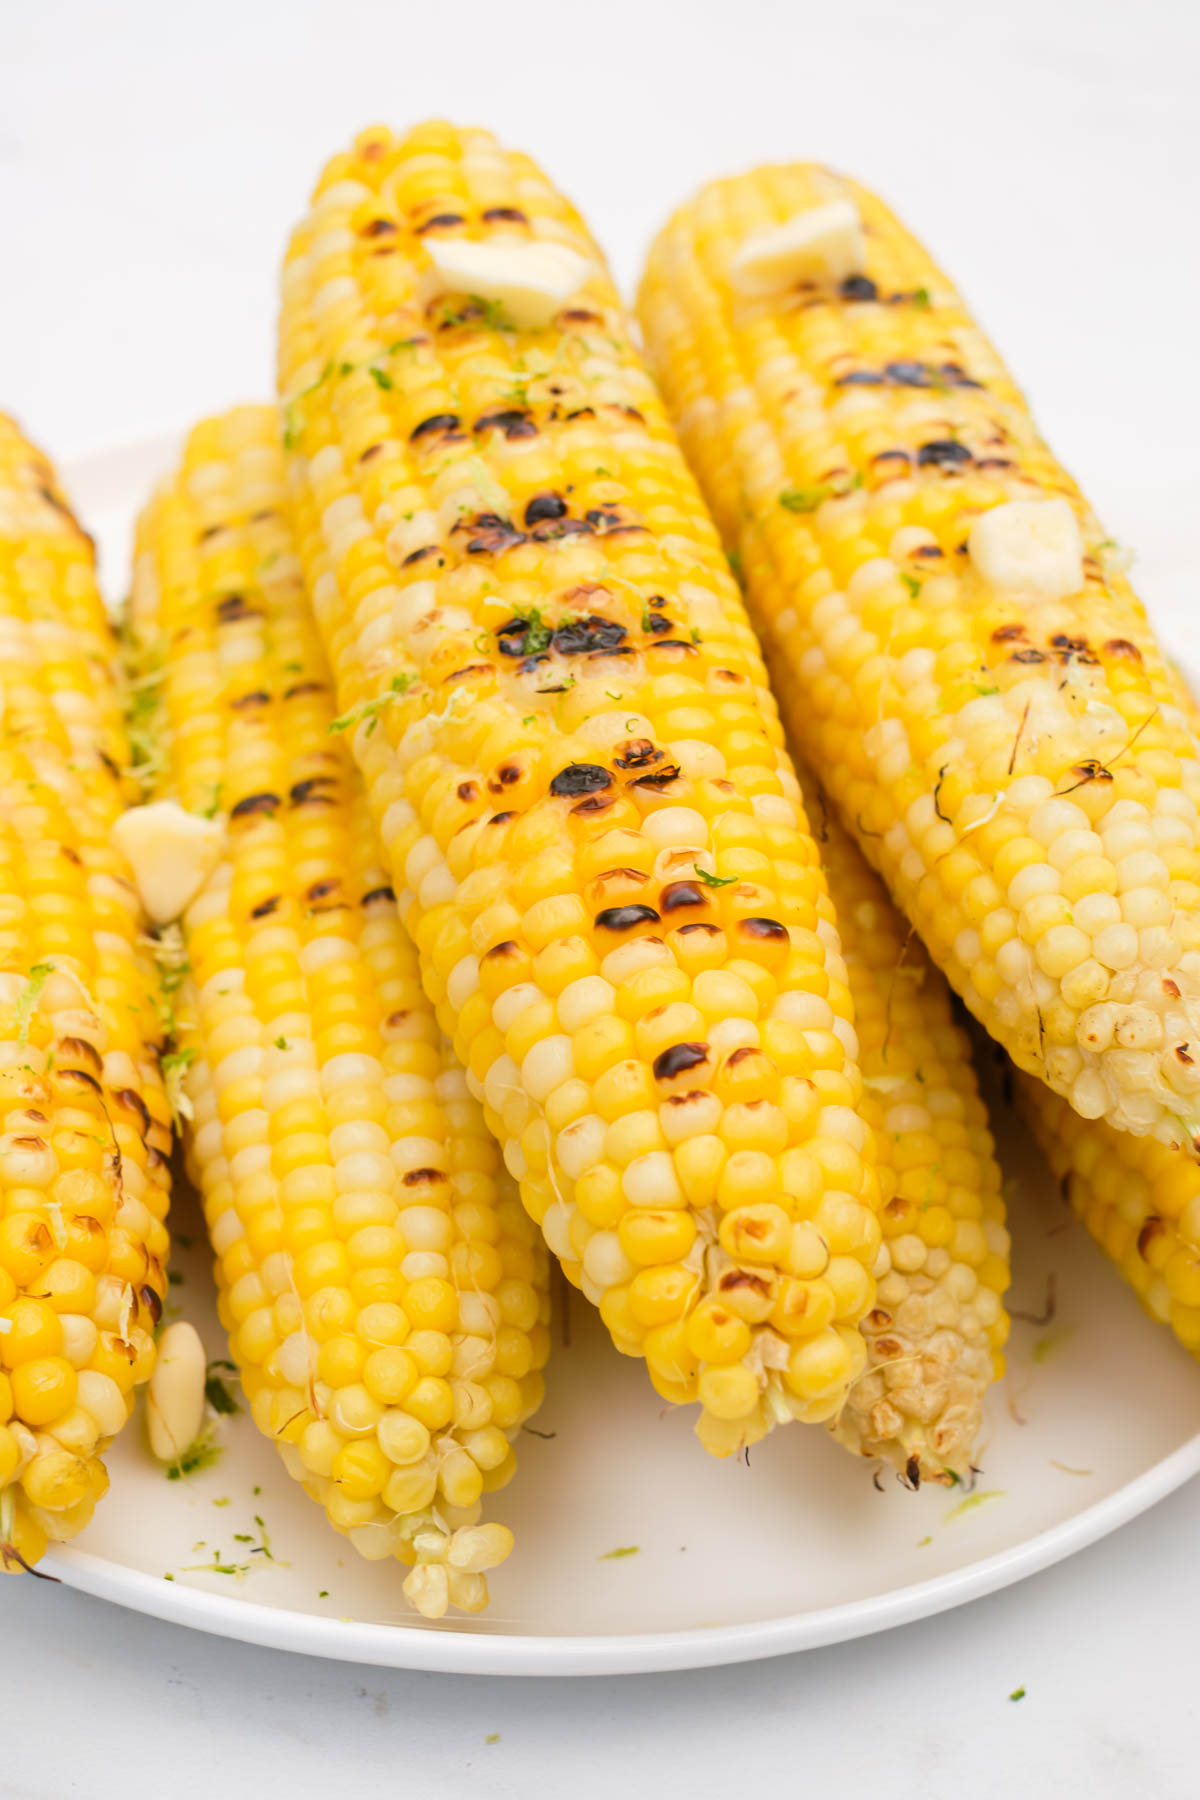
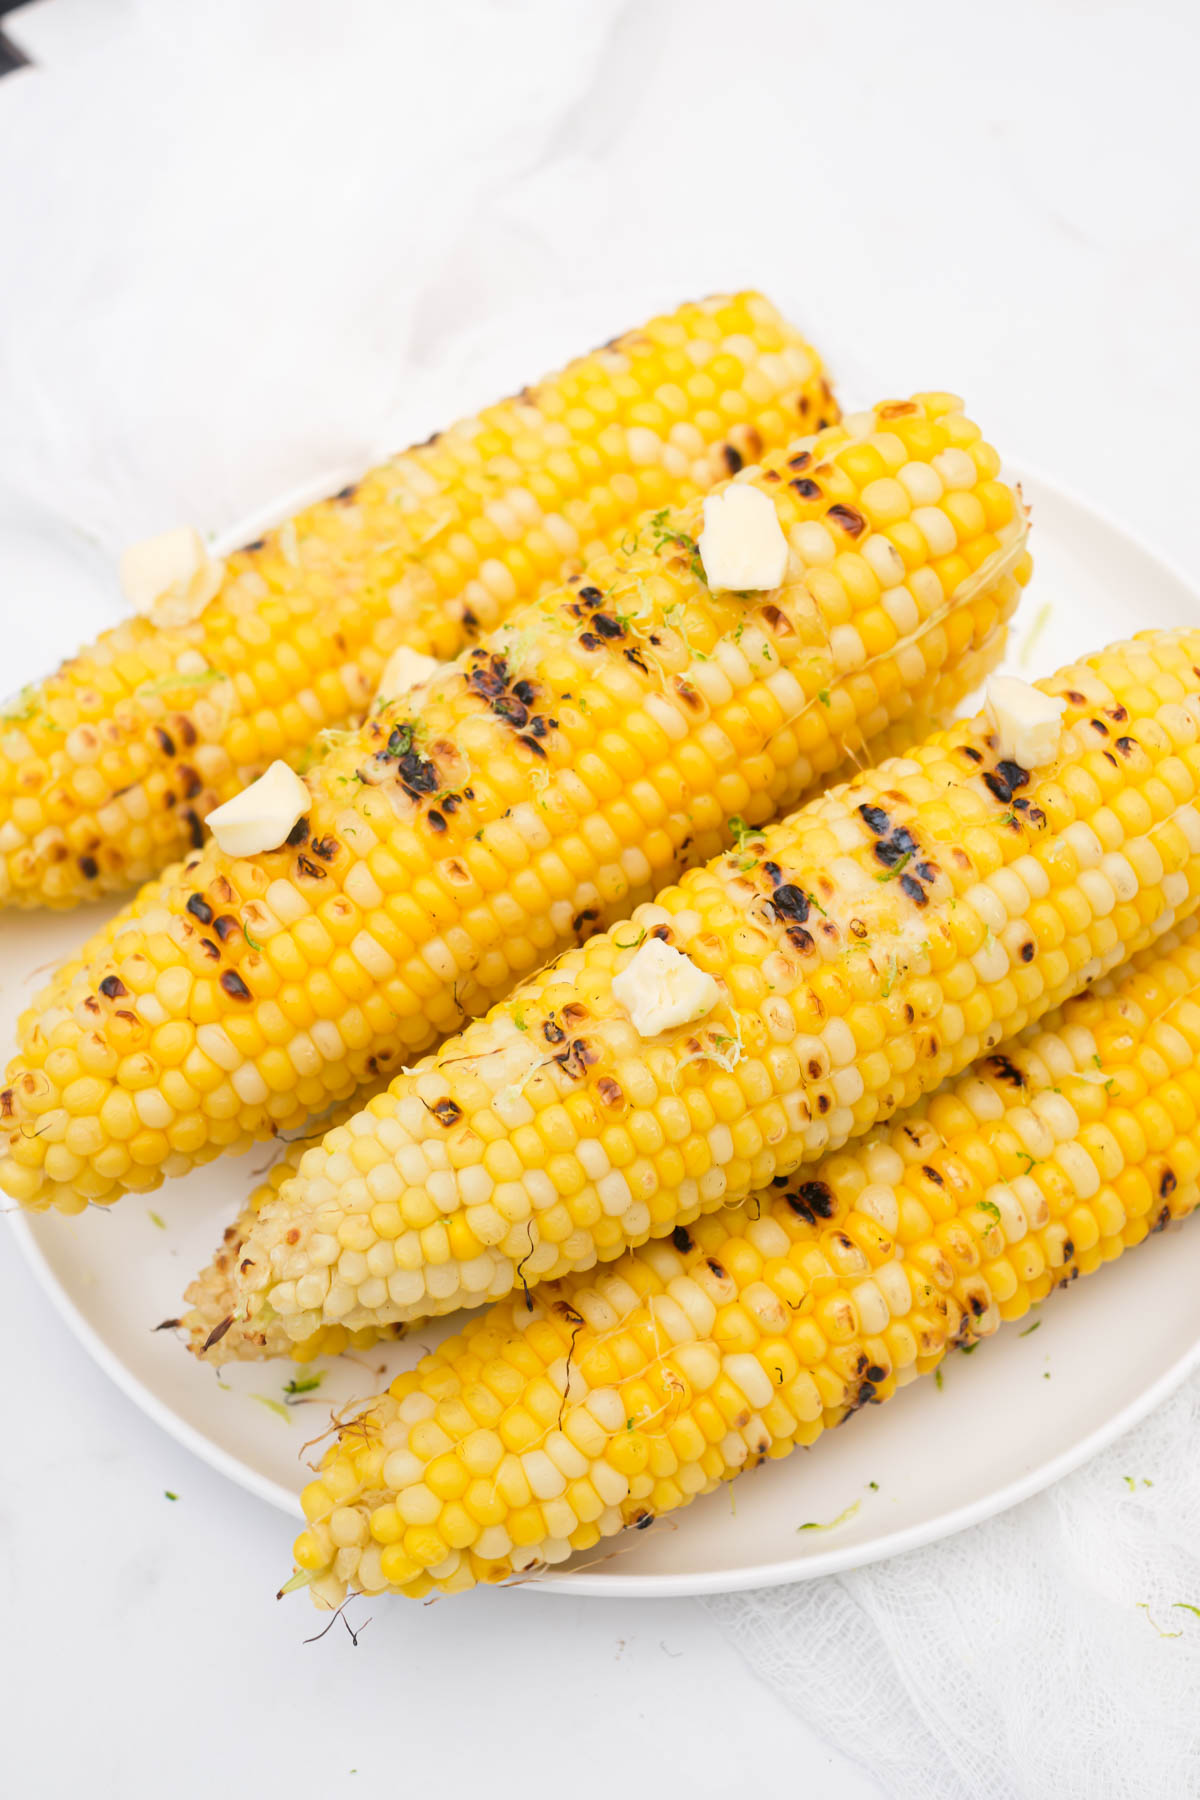
- Let corn cool for a few minutes, then top with butter and season (see topping ideas below) and serve.


Cook In The Ninja Foodie Grill and Air Fryer
- Select the Grill function, set the temperature to 400 degrees F / 200 degrees C, set the timer to 15 minutes, and let the Ninja grill preheat for a couple of minutes.
- Once the Ninja grill is preheated, add the seasoned corn directly on the grill grate.
- Close the lid and let grill for 10-15 minutes, making sure to turn the corn occasionally so that it cooks evenly. Cook till it is tender and charred to your preference.
- Let corn cool for a few minutes before serving.
Cook in the Ninja Foodie
- Preheat the Ninja Foodi on the Air Crisp function.
- Place the seasoned corn on the air crisp basket.
- Grill for 10-15 minutes, turning halfway through, making sure to turn the corn occasionally so that it cooks evenly. Cook until it is tender and charred to your preference.
Video
Nutrition
Bintu’s Recipe Tips And Optional Toppings
- You can soak de-husked corn in cold water for about 20 minutes to keep the kernels plump and juicy before direct grilling. No need to do this if grilling them in foil.
- If using the Ninja grill – make sure to use silicon tongs for turning and removing to avoid scraping the plate.
- If using the Ninja grill – make sure to turn the corn at leats half way through cooking so they cook evenly
- Classic – just some good old butter and salt.
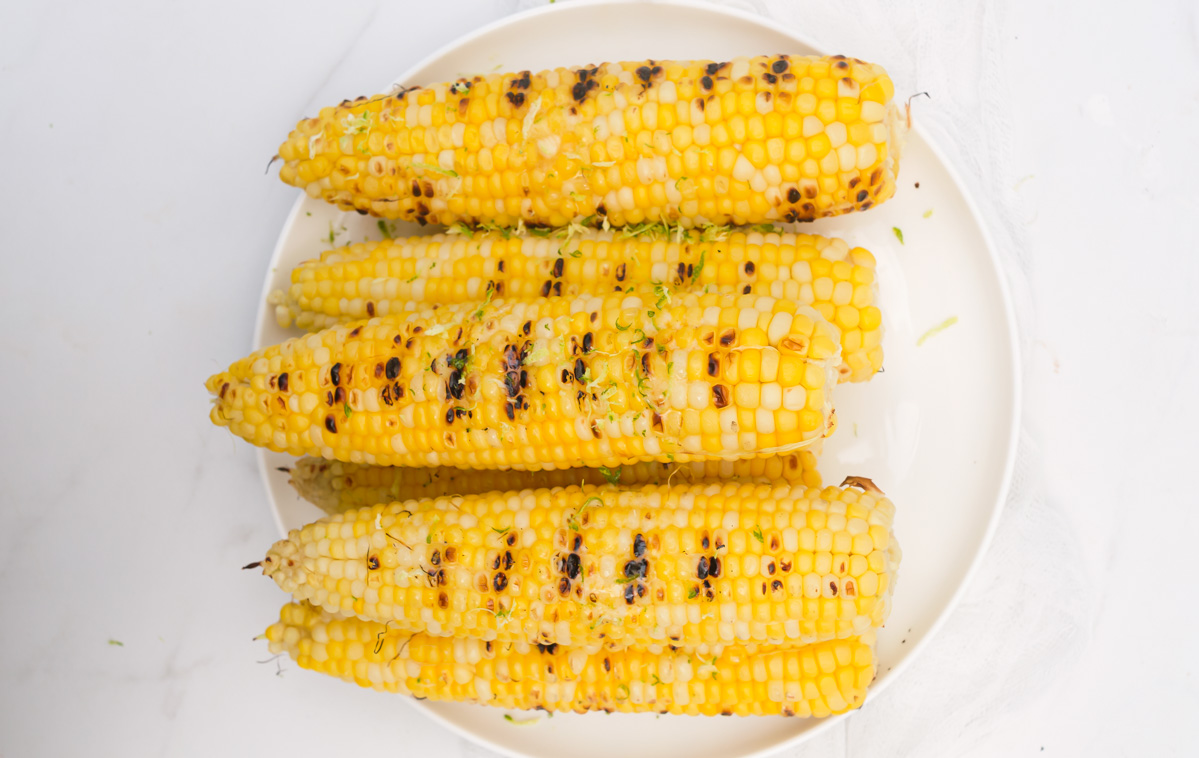
- Mexican – I love adding on some crumble Cojita cheese and lime zest along with butter. Feel free to sprinkle on some Tajin too.
- Fresh herbs – sprinkle on some finely chopped fresh herbs like chopped cilantro, parsley, or chives.
- Lime – use your favorite chili lime seasoning. I loooove Tajin!
- Cheesy – simply add butter and tons of freshly grated parmesan cheese.
FAQs
Depending on the size and you char preference. You will need between 10-15 minutes. Start with the lower cook time, check and keep grilling to your preference.
Totally, that is part of what makes it taste so good. You can also add other seasoning like Parmesan cheese at the end as this will burn if you try and add it before.
More Recipes You Might Like
- Ninja Woodfire Grill chicken tenders.
- Summer grilling recipes.
- Grilled shrimp kabobs.
- Grilled chicken kabobs.
- Grilled broccoli.
- Grilled chicken wrap.
- Grilled mackerel.
- The best BBQ side dishes.
- Memorial Day recipe ideas.
Serving Suggestions
These are good as is but man do they go well with soooooooo many other treats.
- Pasta salads or this Orange fluff salad.
- Grilled steak or this delicious crispy air fryer fish.
Recommended Tools
- These handy grilling tongs make handling the corn a breeze.
- Skewers to use for checking the corn for doneness.
- For the best tools to help make your recipe even easier and more successful, check out my collection of the Best Kitchen Tools on Amazon.
Weight Watchers Points
There are 2 Blue Plan SmartPoints in one serving of this.
Thank you for reading my grilled corn on the cob recipe post. And please come visit again as I continue to slice, dice, and dream up affordable Air Fryer recipes, Instant Pot Recipes, Southern Recipes, and more. Thanks for supporting Recipes from a Pantry, food blog.

Grilled corn on the cob is a summer favorite, with its smoky flavor and charred kernels adding a delicious twist to the classic vegetable
This is so good. It’s a perfect side to a summer barbecue!